This content has been archived. It may no longer be relevant
Impact-Site-Verification: da123893-d461-4dc1-9789-7febe97d4991
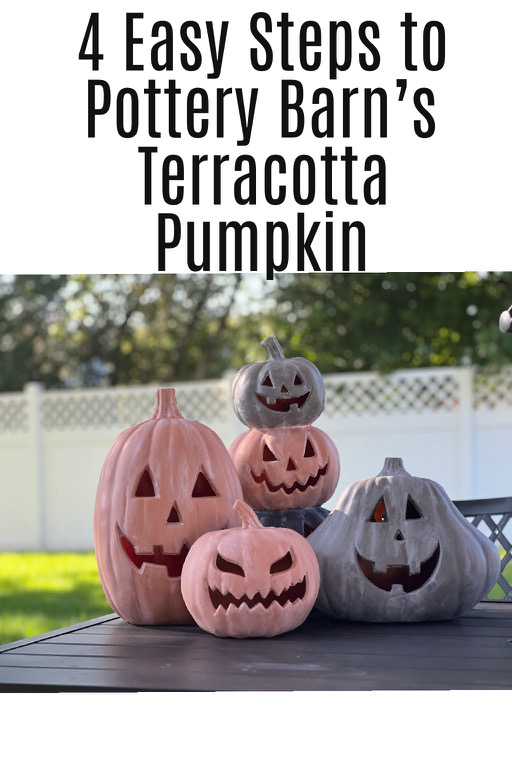
If you’ve been scrolling through tictok, chances are, you’ve seen these Terracotta Pumpkins in your feed! The originals are quite pretty but equally expensive, and they are also sold out everywhere, so if you were opting for the b-u-y instead of the d-i-y, you may be out of luck! I got your back, though, cause instead of the $200+ pricetag for the PB cuties, you can get these for under ~$100.
Now listen, if you’re anything like me, where time is a luxury, I’ll have you know the most time this took was the drying time. I did it while the kids were napping and then came back the next day to do the terracotta effect, which took an additional 30 minutes. So you’re about an hour and 1/2 in elbow grease or ashy hands, however, you want to look at it. So I’m not gonna bore you with all the details and just give you the “meat and pumpkins” of this project. Here’s what you’ll need.
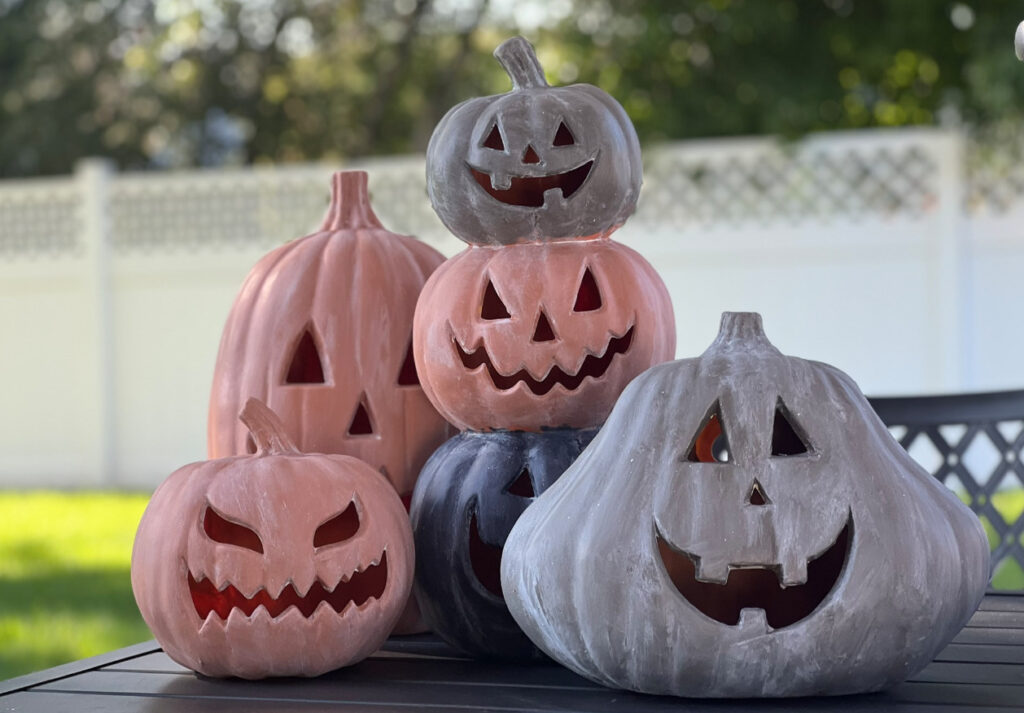
1. Pumpkins from Lowes or Home Depot, I used these from Lowes Pumpkin 1, Pumpkin 2, Pumpkin 3 and these Pumpkins from Target
2. Sample Paint in these colors
- Sherwin Williams in Spiced Cider
- Sherwin Williams in Porpoise
- Sherwin Williams in Domino
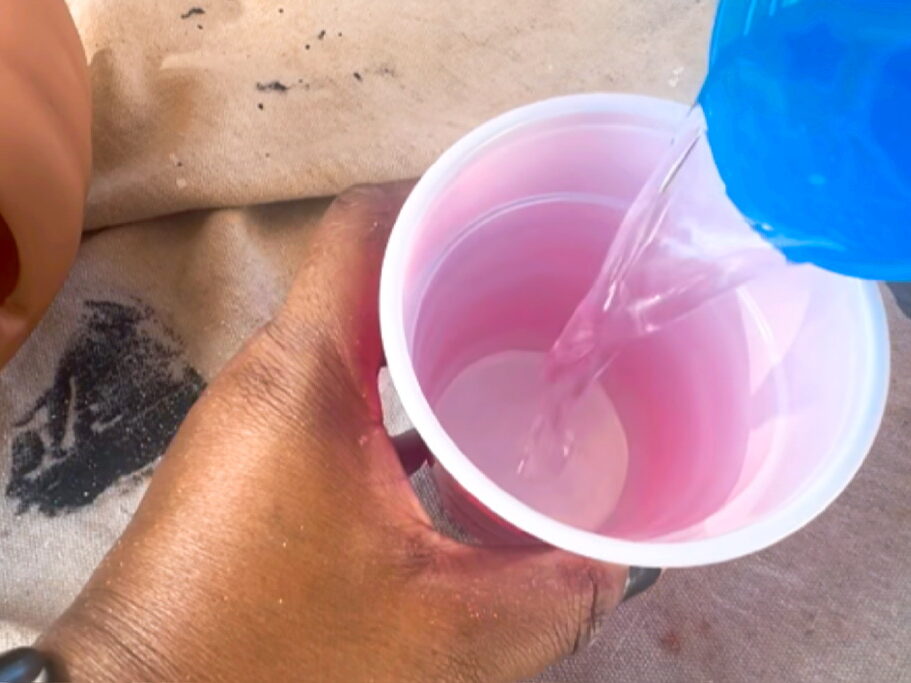
- If you have white paint on deck, that will do or you can use a white sample as well. You can also go to Michaels and get a small white latex paint as you won’t need a lot of this and it’s mixed with water.
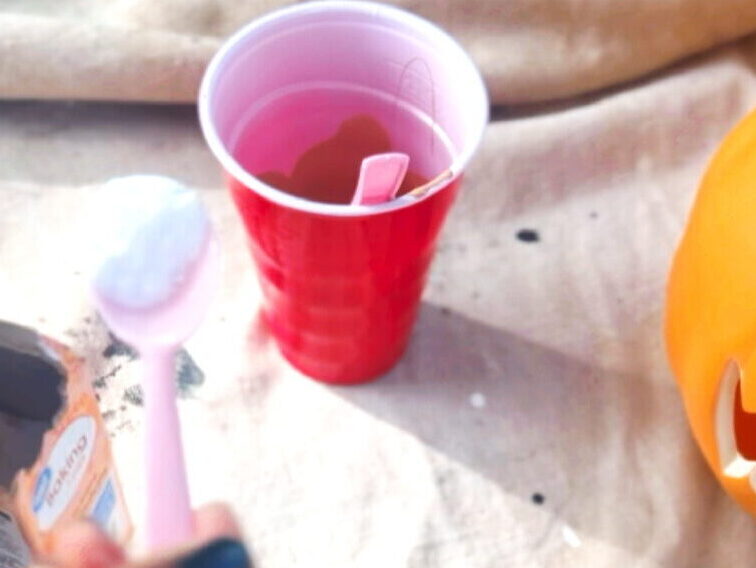
3. Baking soda, the cheap kind.
4. Sponges (3-4)
5. 1 bristled brush
6. Paper towel
Step 1: Add 2 or 3 spoons of baking soda to your sample paint ; this will make it thicker and give it a bit more texture instead of a smooth finish. I don’t think this worked as much as people say, but I did it anyway. If you don’t have baking soda on deck, I wouldn’t bother.
Step 2: Apply the paint to the pumpkins, here’s a quick tip use the step as your holder and once the entire pumpkin is painted then you can paint the stem.
Step 3: Let them dry, they dry pretty quickly. I came back the next day to complete the terracotta look but it should take about an hour to dry if you’d like to start the white-washing process.
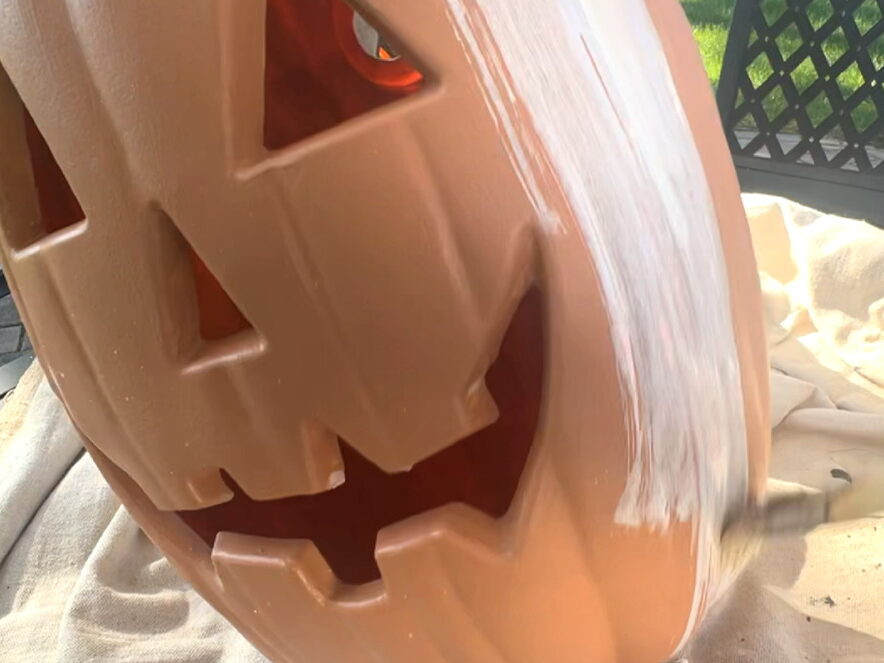
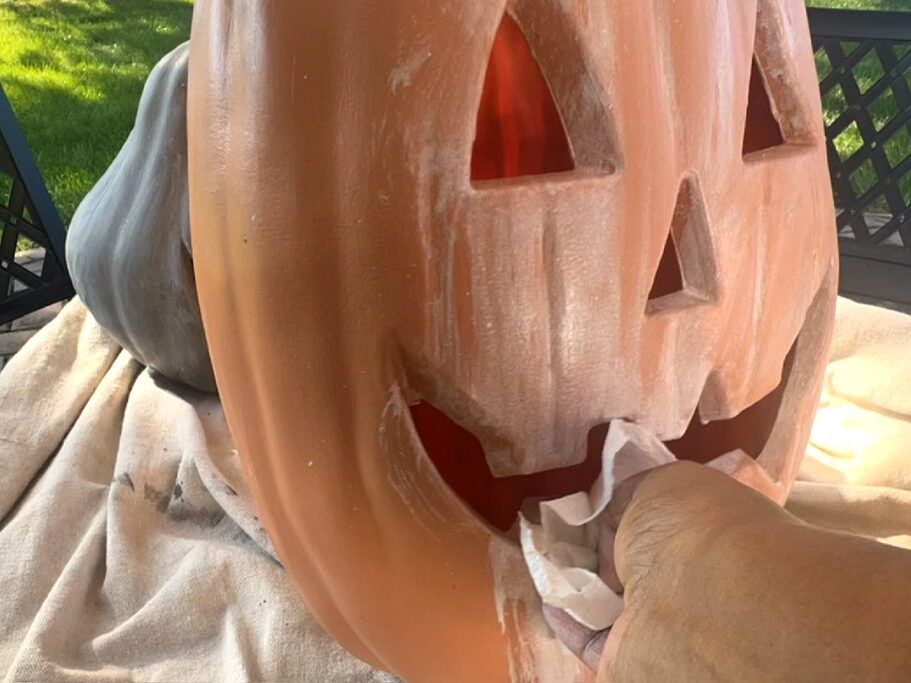
Step 4: Add your white paint and water in a 1:2 ratio more water than paint. Use the bristled brush to apply partially to the pumpkin, and then take a paper towel and dry off immediately. On a normal day, we strive for moisture but in the case of these pumpkins, the ashier, the better! The idea is to get it to look like it’s made out of clay! Once you have applied the whitewash, let them dry fully for about another hour, and then you are good to go. Stay tuned for my next post on how I styled these pretty little pumpkins.
If you’re a looker more than a reader, catch this tutorial on here and here! Happy Pumpkining Peeps!